Difference between revisions of "Wiring Editor"
| (136 intermediate revisions by 2 users not shown) | |||
| Line 1: | Line 1: | ||
<iframe key="wiki" align="right" width="100%" height="1050" level="" path="/gojs/samples/wiring24.html?cid=QmfYGziaSS7BtmoyZxJZU716HJ3BC36YXu4oksLwgLZSKW&palette=heatweb_parts.json&height=660px" /> | |||
== See Also == | |||
* [[Wiring Editor Testing|Latest (Beta Testing) Version]] | |||
*[[Palettes]] | |||
== Menus == | |||
<gallery widths="200" heights="200"> | |||
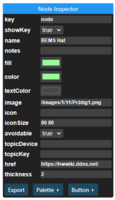
File:Wmenu1.PNG|Node Inspector | |||
File:Wmenu2.PNG|Button Inspector | |||
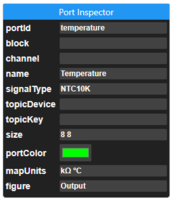
File:Wmenu5.PNG|Port Inspector | |||
File:Wmenu6.PNG|Port Mapping Inspector | |||
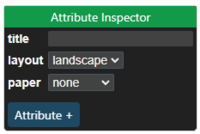
File:Wmenu3.PNG|Document Attribute Inspector | |||
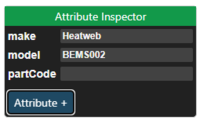
File:Wmenu4.PNG|Node Attribute Inspector | |||
</gallery> | |||
== Ports and Colours == | |||
Diagrams are based around nodes (devices) with ports for making connections. | |||
To enable automatic wiring, port types are required as well as rules about how they can be connected. | |||
Colours tend to be the most commonly used identifier for types of connections, with in computer language is a hex value representing red, green and blue. #000000 is black, #ff0000 is red, #00ff00 is green, #ffffff is white, and so on. | |||
However we require another level of distinction as we may desire to wire to a particular GND for example, or to give communications a plus and minus. This is achieved by using the last digit of the colour as a variation, providing 1,048,576 colours (or signal levels), each with 16 variations. | |||
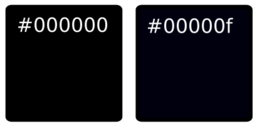
Taking GND (black) for example. #000000 is the default black and used for ground connections. We may however use #00000f for a power supply ground, or #000001 for a less popular ground that can be used if needed in preference to a popular ground. | |||
[[File:Compareblk.png|frameless|257x257px]] | |||
One can take this to an extreme and give every signal level a unique colour value. This may well feature in future live wiring systems. | |||
By default, ports connect to ports of the same colour. However, a 0-10V OUT cannot connect to another 0-10V OUT so we specify compatible ports with: | |||
# A port figure, which can be either an "''Input", "Output"'' (shown by a direction arrow)'', or a''ny other standard shape figure including "''Rectangle"'', "''Circle"'', "''TriangleUp"'', etc. Inputs cannot be wired to outputs. | |||
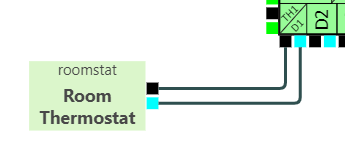
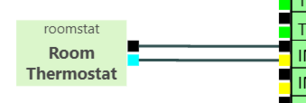
# An optional list of compatible colours called '''''signalTypes''''', in order of preference. If a preferred port type is free it will be used, if not then the next in the list will be tried, and so on. You can see this in use in the following data for a room thermostat, where it is used to allow connection to both a dry contact #00ffffff and a universal input #fffffe. | |||
{"name":"Room Thermostat","color":"#dbf6cb","leftArray":[],"rightArray":[{"portId":"right0","portColor":"#000000"},{"portId":"right1","portColor":"#00ffff",'''"signalTypes":["#00ffff","#fffffe"]'''}],"topArray":[],"bottomArray":[],"key":"roomstat","size":"78.78515625 47"} | |||
[[File:Rststwire.png]] [[File:Rststwire2.png|306x306px]] | |||
== Buttons == | |||
This power supply contains additional buttons for performing actions, such as opening a web page or PDF. | |||
[[File:12vdcicons.png|frameless|220x220px]]<br /> | |||
<pre> | |||
{"name":"12VDC Power","buttonArray":[{"href":"https://hwwiki.ddns.net/","color":"#000000","fill":"#0000ff","figure":"ElectricalHazard"},{"text":"Open","href":"https://hwwiki.ddns.net/","color":"#000000","fill":"#0000ff"}],"fill":"#ebebeb","leftArray":[{"portId":"left0","portColor":"#e88600","figure":"Output"},{"portId":"left2","portColor":"#000002","figure":"Output"}],"rightArray":[],"topArray":[],"bottomArray":[],"key":"12VDC22","size":"67 76","loc":"709.4688121714489 -308.66453398276076","figure":"Procedure","color":"#000000","thickness":1,"notes":"","textColor":"#484848"} | |||
</pre> | |||
The buttons are created by adding a '''''buttonArray''''' (shown below). Buttons have either text or an icon (figure). The array below has one of each. | |||
<pre> | |||
"buttonArray":[{"href":"https://hwwiki.ddns.net/","color":"#000000","fill":"#0000ff","figure":"ElectricalHazard"},{"text":"Open","href":"https://hwwiki.ddns.net/","color":"#000000","fill":"#0000ff"}] | |||
</pre> | |||
== How to Use in Articles == | == How to Use in Articles == | ||
| Line 34: | Line 89: | ||
{{gojs|width=49% |height=600 |src=wiringFrame| id=example1}} | {{gojs|width=49% |height=600 |src=wiringFrame| id=example1}} | ||
== Versions == | |||
{| class="wikitable" | |||
|+ | |||
!Version | |||
! | |||
|- | |||
|wiring22 | |||
| | |||
* Attributes added for all nodes | |||
*Palettes can be loaded from saved drawings and palettes on either server of IPFS | |||
|- | |||
|version21 | |||
| | |||
* Added Attribute Inspector including page title and orientation (portrait/landscape) | |||
* Orientation tied to PDF page orientation | |||
* PDF scaling corrected | |||
* Saves to server filesystem as well as IPFS | |||
* Where the Title attribute is filled in, diagrams will also be saved to this filename on the server This is to provide an updateable diagram, and also an immutable IPFS copy | |||
|- | |||
|wiring20 | |||
| | |||
* Added Button Inspector (up to 3 buttons) | |||
* Added node context menu to add a New Button | |||
|- | |||
|wiring19 | |||
| | |||
* Port value Map Inspector added, appears if ''mapUnits'' is not empty | |||
*Port sizes can be altered via Inspector | |||
*Hidden wide ports can now be used to move other ports apart, or position to corners | |||
|- | |||
|wiring18 | |||
| | |||
* Port context menu altered to assign ''signalType'' | |||
*Port Inspector | |||
|- | |||
|wiring17 | |||
| | |||
* Connection processing with export for controller | |||
|- | |||
|wiring16 | |||
| | |||
* PDF Download | |||
|- | |||
|wiring15 | |||
| | |||
* Nodes can be rotated | |||
* Groups given dotted surround | |||
* Converted SVG images replaced with data URLs | |||
* General layout alterations | |||
|- | |||
|wiring14 | |||
| | |||
* Button to save to IPFS | |||
* Loads from IPFS CID | |||
|- | |||
|wiring13 | |||
| | |||
* Node icons refined to allow both figures and text | |||
* Node icons arranged vertically | |||
|- | |||
|wiring12 | |||
| | |||
* Node icons changed to buttons with option for text | |||
* Icon buttons open web pages in a target window | |||
|- | |||
|wiring11 | |||
| | |||
* Port directions (figures) added, so inputs and outputs can share the same identity colour | |||
*Autowiring updated to account for compatible directions | |||
*Node icons added | |||
|- | |||
|wiring10 | |||
| | |||
* Node shapes added to context menu | |||
|- | |||
|wiring9 | |||
| | |||
* Port selection added to port context menu | |||
|- | |||
|wiring8 | |||
| | |||
* Context menus for links | |||
* Context menus for changing node and link line type, colour, and thickness | |||
* Grouping on nodes using Ctrl+G with group context menus | |||
|- | |||
|wiring7 | |||
| | |||
* Port labels shown on hover | |||
|- | |||
|wiring6 | |||
| | |||
* Palette reduced in width | |||
*Download PNG | |||
|- | |||
|wiringFrame | |||
|basic view with download SVG button | |||
|} | |||
== Improvements == | == Improvements == | ||
Latest revision as of 17:54, 23 January 2023
See Also
Menus
Ports and Colours
Diagrams are based around nodes (devices) with ports for making connections.
To enable automatic wiring, port types are required as well as rules about how they can be connected.
Colours tend to be the most commonly used identifier for types of connections, with in computer language is a hex value representing red, green and blue. #000000 is black, #ff0000 is red, #00ff00 is green, #ffffff is white, and so on.
However we require another level of distinction as we may desire to wire to a particular GND for example, or to give communications a plus and minus. This is achieved by using the last digit of the colour as a variation, providing 1,048,576 colours (or signal levels), each with 16 variations.
Taking GND (black) for example. #000000 is the default black and used for ground connections. We may however use #00000f for a power supply ground, or #000001 for a less popular ground that can be used if needed in preference to a popular ground.
One can take this to an extreme and give every signal level a unique colour value. This may well feature in future live wiring systems.
By default, ports connect to ports of the same colour. However, a 0-10V OUT cannot connect to another 0-10V OUT so we specify compatible ports with:
- A port figure, which can be either an "Input", "Output" (shown by a direction arrow), or any other standard shape figure including "Rectangle", "Circle", "TriangleUp", etc. Inputs cannot be wired to outputs.
- An optional list of compatible colours called signalTypes, in order of preference. If a preferred port type is free it will be used, if not then the next in the list will be tried, and so on. You can see this in use in the following data for a room thermostat, where it is used to allow connection to both a dry contact #00ffffff and a universal input #fffffe.
{"name":"Room Thermostat","color":"#dbf6cb","leftArray":[],"rightArray":[{"portId":"right0","portColor":"#000000"},{"portId":"right1","portColor":"#00ffff","signalTypes":["#00ffff","#fffffe"]}],"topArray":[],"bottomArray":[],"key":"roomstat","size":"78.78515625 47"}
Buttons
This power supply contains additional buttons for performing actions, such as opening a web page or PDF.
{"name":"12VDC Power","buttonArray":[{"href":"https://hwwiki.ddns.net/","color":"#000000","fill":"#0000ff","figure":"ElectricalHazard"},{"text":"Open","href":"https://hwwiki.ddns.net/","color":"#000000","fill":"#0000ff"}],"fill":"#ebebeb","leftArray":[{"portId":"left0","portColor":"#e88600","figure":"Output"},{"portId":"left2","portColor":"#000002","figure":"Output"}],"rightArray":[],"topArray":[],"bottomArray":[],"key":"12VDC22","size":"67 76","loc":"709.4688121714489 -308.66453398276076","figure":"Procedure","color":"#000000","thickness":1,"notes":"","textColor":"#484848"}
The buttons are created by adding a buttonArray (shown below). Buttons have either text or an icon (figure). The array below has one of each.
"buttonArray":[{"href":"https://hwwiki.ddns.net/","color":"#000000","fill":"#0000ff","figure":"ElectricalHazard"},{"text":"Open","href":"https://hwwiki.ddns.net/","color":"#000000","fill":"#0000ff"}]
How to Use in Articles
The following two elements have been given an id (view in the source) that can then be passed to a diagram using an iframe tag.
The second element has also been hidden from view.
This way it is possible to create a design on this page and then include it into articles using pure JSON.
Versions
| Version | |
|---|---|
| wiring22 |
|
| version21 |
|
| wiring20 |
|
| wiring19 |
|
| wiring18 |
|
| wiring17 |
|
| wiring16 |
|
| wiring15 |
|
| wiring14 |
|
| wiring13 |
|
| wiring12 |
|
| wiring11 |
|
| wiring10 |
|
| wiring9 |
|
| wiring8 |
|
| wiring7 |
|
| wiring6 |
|
| wiringFrame | basic view with download SVG button |
Improvements
- Number terminals
- Fix widths with top/bottom terminals
- Hover text over terminals
- Change colour of blocks
- Position terminals (drag along sides)
- Menu to change line thickness, type, colour, arrows.
- Optional wire labels = controller number + terminal number (e.g. 101)
